Tuesday, February 16, 2010

peanut buttah cups!


This is a super simple recipe for one of my favorite candies of all time! I made these for valentines day for my special someone in a heart shaped silicone ice cube tray, but you can make them in whatever you want, I recommend the little paper baking cups to get a more traditional feel!

you will need: double boiler or something similar, you need to melt the chocolate slowly so it doesn't burn! the microwave won't cut it dummy!
paper or foil baking cups, any size you want.
a heat proof rubber spatula to mix up your chocolate
a small spoon to ensure chocolate gets in all the right places
an electric mixer would be super swell but you can use arm power too!

ingredients:
one 12 oz bag chocolate chips
1c creamy peanut butter (i like skippy)
1c confectioners sugar

Directions:

pour chocolate chips into double boiler and let them melt, stir it up every couple of minutes to make sure they melt evenly.

in a medium bowl combine peanut butter and powdered sugar until well mixed! I use a hand mixer but I'm sure your arm will do just fine. This will be super thick and clumpy!

set out your little baking cups so they are ready to go, the yield of this recipe is very dependent on how thick you make your chocolate. Line the bottom and sides of the baking cups put in the freezer to harden, this will make it so when you put the peanut butter in it doesn't escape the chocolate later! That sneaky peanut butter is always trying to escape! that little goober rascal!

once your cups are hardened slightly pull them out and put a dollop of peanut butter in each one, then use the rest of your melted chocolate to cover the tops and place in freezer again to harden. After a few minute these babies will be ready to go and making your roommates mouth water! These are so easy even non vegans might be swayed from ever buying them in the store again! (a girl can dream!)

If you make these in silicone ice cube trays to get cool holiday shapes make sure you freeze them a little longer cause those buggers are a hassle to get out and will break if the chocolate is not thick enough or cold enough!

ENJOY!

Monday, January 18, 2010

I scream, you scream!


Hello again. I have recently jumped head first into the world of home made ice cream. First of all, it has a much wider array of flavors than what you can find at the store, if you can dream it, you can do it! Secondly, holy crap it tastes so much better than anything I have ever bought in a store! Its mind blowing-ly good! Its fresh and creamy and frozen and wonderful! Thirdly, you can add oreos or sprinkles or chocolate chips to ANY flavor of ice cream you want. I am in love!

On Thursday night my best friend Tessa and I made Almond ice cream and pistachio ice cream, BOTH of them turned out amazing but she made off with all the pistachio so here is the recipe for the almond one. I got it out of this cookbook... (errr freezebook? how about recipe book) called the Vegan Scoop.

Almond Ice Cream.

You will need:

1 c. almond milk (divided)
2 tbsp. arrowroot powder (this stuff is super expensive at your local health food store or super cheap online in bulk!)
2 c. soy creamer (this usually comes in 1 pint packages = perfect)
3/4 c. sugar
1 tbsp. vanilla extract
1 tbsp. almond extract
3/4 c/ roasted chopped almonds (i put mine in the blender after i roasted them to make a mix of chunks and almond dust to give my ice cream a nice consistency!)

In a small bowl combine 1/4 c. almond milk and your arrowroot powder to make what they like to call "arrowroot cream" set that aside until you're ready for it. You think you're ready for it now? Nope, you're not.

In a small sauce pan, combine the rest of the almond milk, the soy creamer and the sugar, mix well and bring to a boil, and then remove from heat and add the "arrowroot cream" and your extracts. Put mixture into the fridge for several hours to cool, or if you are an impatient sweet maniac like me, in the freezer. Make sure to check it every hour or so to make sure it doesn't turn into a popsicle! When it's nice and cold you're ready!

Freeze according to your ice cream maker's instructions! If you are using a machine, leave the almond nuggets to the side until your ice cream is thoroughly churned and almost done, if you're using some sort of salt and ice technique mix them in whenever you feel good about it. Make sure you don't clog up any mechanisms or whatever. I dunno how cavemen make ice cream, I just know how I do, and its the laziest way possible.

Congratulations! You now have about 1 quart of tasty ice cream to get all over your chubby little face! All of your friends are jealous! Remember to share! HOORAY!

Tuesday, January 5, 2010

Okay so I have horribly, horribly, neglected my blog this past year, and I promise to be better, I promise! I moved a lot, and got a lot of funky gizmos that bake for me and made me lazy... I also just got an electric ice cream maker which I can also see making me terribly lazy and fat in the near future! BUT, I do love to cook still I think I have just been stuck making other people's recipes and not being creative. I still love you food. I promise to treat you right this year. more recipes, coming soon.

Sunday, April 12, 2009

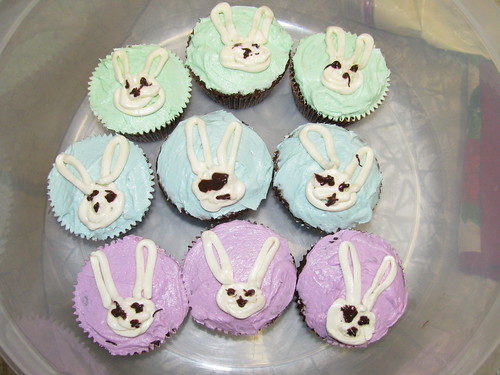
HAPPY EASTER!!


I am not so good at frosting, but you get the gist. I like the one in the middle, he's a CYCLOPS!
(I totally did that on purpose!)

Thursday, March 5, 2009

ice cream cake: the tutorial


Ice cream cakes are hard to make, I discovered this when my friend Ashley made one and I watched her frustration as it melted and got all wonky and didn't stay frozen. This made me want to make my own ice cream cake, and it also helped me be prepared for all of the wonky crap I might have to deal with. I made this cake for my friend Jess's birthday and I wanted to post all the cool pictures I took to help you the reader, make your own perfect un-wonky ice cream cakes! I promise to post a cake recipe soon but until then I recommend you pick up "vegan cupcakes take over the world" which is where I get all my cake recipes from.


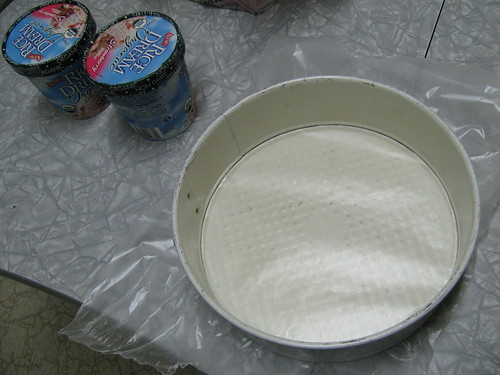
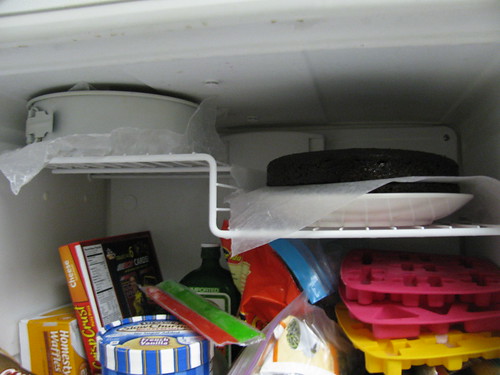
I used a spring form pan for the ice cream, this makes it easier to pop the ice cream out in one piece without it breaking in half of getting all melty. I coated the bottom in wax paper and actually clamped it in there so the sides wouldn't be all wrinkly ice cream looking.


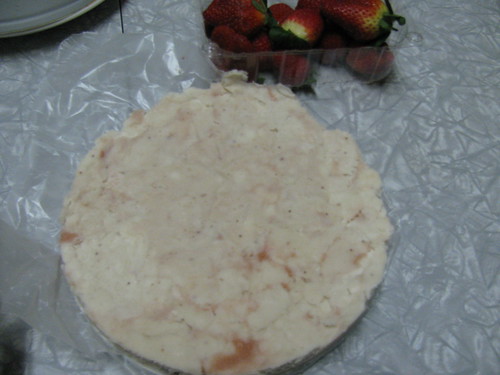
Use two pints of your favorite vegan ice cream, Jess likes strawberry so I used the only strawberry ice cream I could find. You would think strawberry ice cream would be a staple in vegan ice cream world since it is so important in non vegan ice cream world but no, I never see it anywhere. Its kinda effed up.


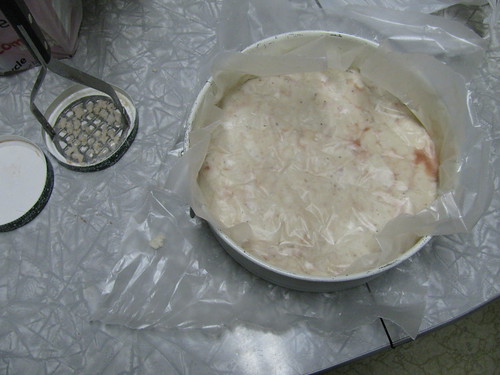
Mash that shit down and put wax paper on it and squish it all flat through the wax paper with your fingers so it hits the sides and you know is as flat as possible. Put it in the freezer! This needs to freeze overnight for maximum strong cake mode.


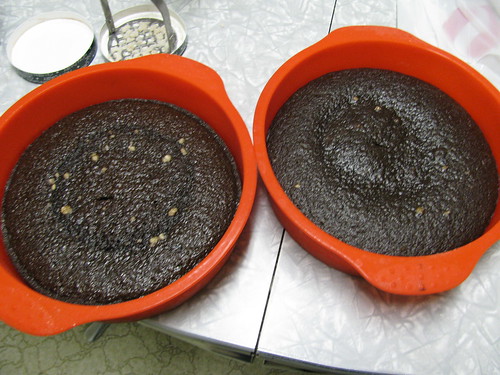
Now that that's out of the way you have time to make the cake!! Dig up your favorite cake recipe and bake it, then put it in the freezer for a few hours to make sure that its cool!! Make sure the cake is completely cold before trying to combine it with the ice cream layer because a warm cake will make the ice cream melt!


I separated my cakes with a layer of wax paper for maximum freezer storage. Don't stack them without a dividing layer cause they will get stuck together. Use some plastic wrap or wax paper, aluminum will stick to the frozen cake and so will paper. Don't be a dummy!! SCIENCE!!


Ice cream layer!!!!


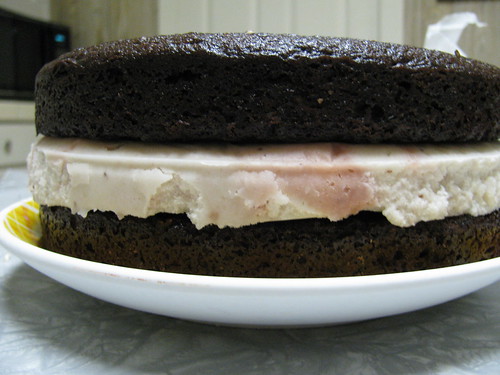
GIANT ICE CREAM SANDWICH!!! (if you hate frosting eat it like this!! ) This is the part where you freak out and panic and try to rush! OH GOD HURRY FROST IT BEFORE IT MELTS!!


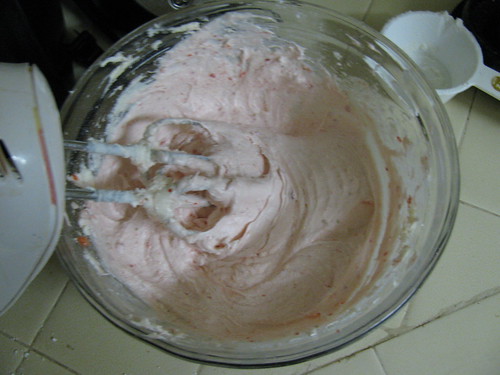
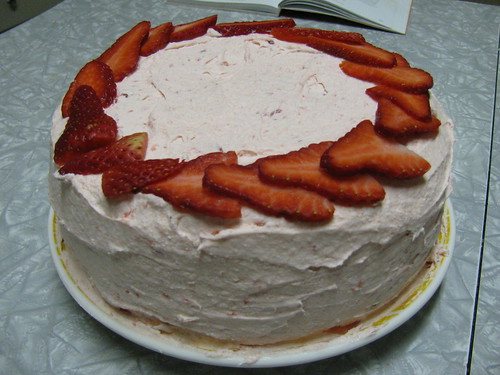
Strawberry butter cream frosting! I made this with real strawberries, that pink is all natural. I would post the recipe but unfortunately its not a stable frosting in non ice cream cake situations and gets all separatey and I don't want to do that to you guys, it was hard to deal with it. Also it was a disgusting mess when it got warm!!


I cut up strawberries and put them on top, oohh la la only the best for my Jess. She was stoked. Life is beautiful, and so is this ice cream cake. BOO YAH! Okay now you make one and send me pictures (and save me a piece!!)

Friday, February 20, 2009

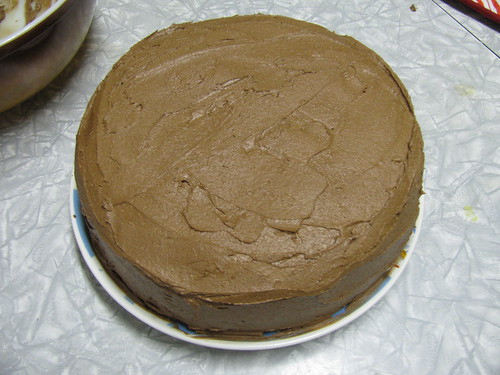
Abuelita frosting


This is a bit of a variation on a theme. I have always felt that birthdays are a day for celebrating, what better way to celebrate with a cake? Honestly, in my opinion, a birthday without cake is a piss poor birthday. Since I live my life by this celebratory kredo I always tend to be the one making the cakes. I am a big fan of a vanilla cake, but sometimes I get a little crazy with the frosting. I like trying new things. One time I made vanilla frosting with TANG drink mix in it, it was pretty awesome and had little orange flavor bursts! YUM. This time I decided to take the new cinnamon extract out for a whirl, in the fashion of my favorite regional hot chocolate "abuelita"


Ingredients:
1/4 cup margarine
1/4 cup shortening
1/2 cup cocoa powder
2 1/2 cups confectioners sugar
3 Tbsp "milk"
approximately 3 dashes of ground cinnamon (i shook the thing thrice)
1 1/2 tsp cinnamon extract.


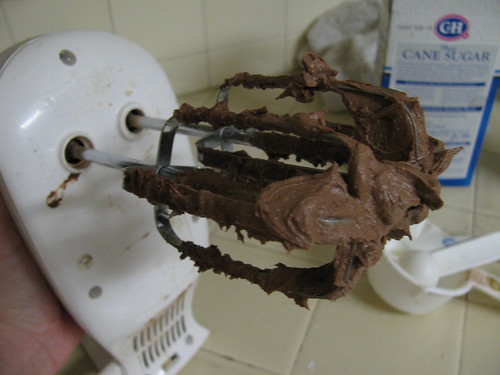
Beat together the margarine and shortening until smooth, add cocoa powder and beat until well mixed. Add in powdered sugar 1/2 cup at a time separated by dashes of "milk" to keep the party going. Once the sugar is completely mixed in and smooth add the cinnamon extract to spice things up a little and beat the heck out of that to make sure its well dispersed.


Spread this stuff all over your cakes, cupcakes or whatever you want. My roommate put my leftover frosting on some waffles this morning, it was a little weird but so is he. If you want to do it too that makes it less weird.

Saturday, February 14, 2009

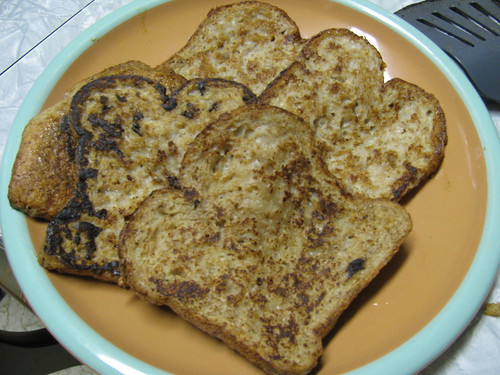
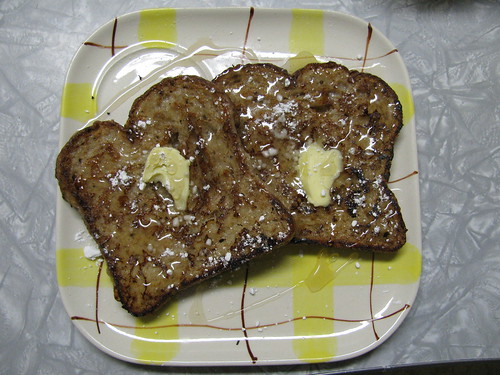
Yummy Banana French Toast

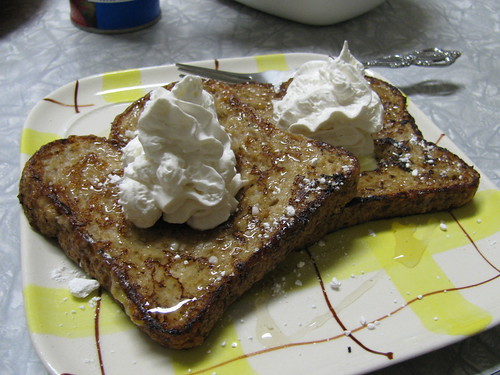
mmmm whippy!


Being a vegan, you gotta get pretty creative to revamp recipes that normally use eggs. I most frequently use bananas but have also used ground flax, apple sauce and this weird cool powder called ener-g egg replacer I get at my local natural foods store.

Anyway this was made for me by my (idk bff) Rich. He always makes me delicious food and I love him forever for it (along with many other valid reasons) it was kind of a "thrown together" type of deal so I re-made it today with more of a recipe feel.

Ingredients:
1 banana
1 cup "milk"
1/4 cup flour
1 tsp cinnamon
1 tbsp corn starch (for thickening!)
1 tsp vanilla extract
6 Slices of bread

Toppings:
Whatever you want really. I recommend confectioners sugar, margarine and agave nectar. Also the old standby maple syrup. Chocolate sauce, peanut butter, jam... I could go on for days! Yum!

Directions:
Break out that blender or food processor and mix all ingredients (minus the bread duh) together until smooth! Put the mixture in a flat bottomed bowl (big enough to lay the bread flat in!)
Get a medium sized pan and use a little margarine to coat the pan.


On medium low heat warm up your pan, I always work with an already warm pan so my food cooks evenly! Lay a slice o' bread in the batter bowl and coat both sides, don't let it sit too long, no one likes soggy toast. Put it in the pan and let it cook maybe 2 minutes on each side, I don't know how well your stove works so you better just check it. The toast is done when its a toasty light brown!


see the burnt looking one? I did that when I was taking pictures for you fine people DOH!

Top with a slab of margarine, a sprinkling of powdered sugar and some agave or maple syrup! Okay now bring me my breakfast in bed! Enjoy!!


Thursday, February 5, 2009

Banana chocolate chip muffins!


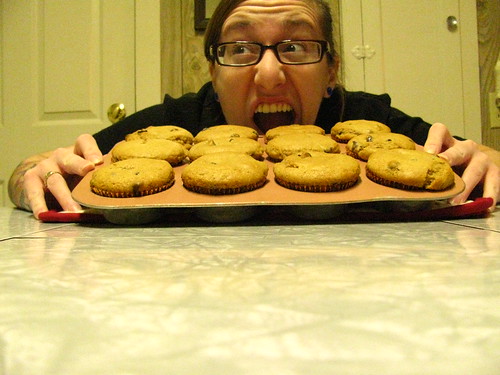
I is tha muffinator


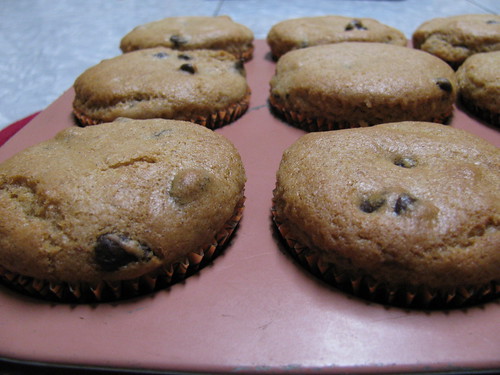
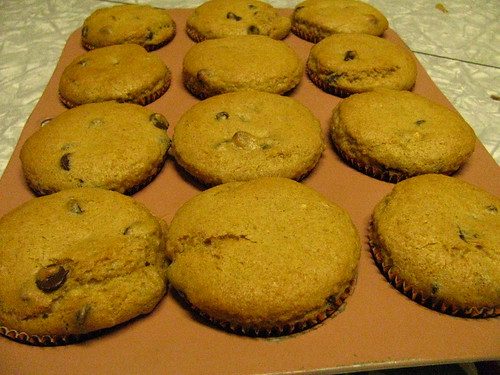
the prettiest muffins you ever did see...

So this originally called for blueberries instead of chocolate chips but who's got blueberries just lying around all the time? Not me, that's for damn sure!! I ain't no fancy pants blueberry keeper!! (no offence to any fancy pants blueberry keepers, I actually envy and commend you for your fancy pants wearing and amazing blueberry keepingness) So since I am too cheap to go buy blueberries I looked to my old fail safe, chocolate.

Chocolate, oh how I love thee.


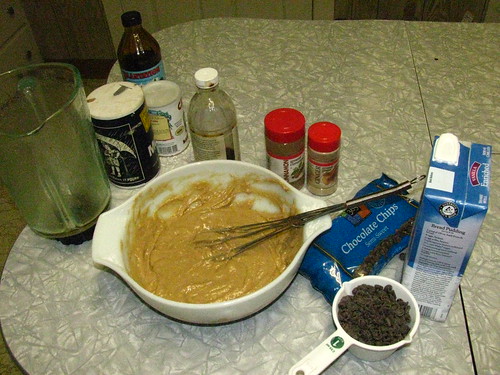
Ingredients:
2 cups flour
1 tbsp baking powder
1 tsp ground cinnamon
1 tsp ground ginger
3/4 tsp salt
3/4 cup sugar
2/3 cup "milk"
1 large banana
1/4 cup canola oil
2 tbsp molasses
1 tsp vanilla extract
1 cup chocolate chips


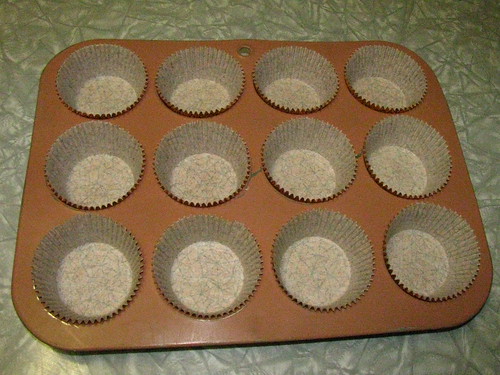
Preheat oven to 375 degrees (do ovens in other countries have their heat knobs marked in celcius?) Lightly oil 12 muffin tins or line with paper liners. In a large bowl mix all dry ingredients together, (except chocolate chips) set aside. In a blender or food processor mix all the wet ingredients (peel the banana first! I also recomend breaking it into chunks for easy blending) together until smooth! Slowly mix the wet mixture into the dry mixture until it looks, you know... mixed, mix in chocolate chips and spoon evenly into muffin cups.


Bake for 20-25 minutes or until a toothpick comes out clean! Let cool completely before removing from tins! Makes 12 muffins! ENJOY!!


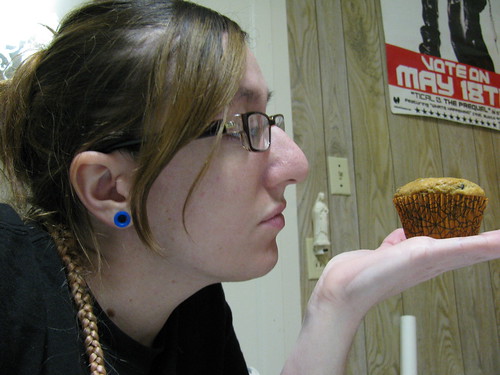
after I bake them I like to have philosophical discussions with them and bait them for compliments...

Tuesday, January 20, 2009

Chocolate Tofu Pie

My friend Marc made an observation yesterday that all of my recipes so far involve chocolate. Let me offer a simple explanation; chocolate is the driving force behind everything I do. Chocolate is my inspiration, chocolate is my mother, my father, my sister and my lover. Without chocolate my world would simply spin off its axis. That being said, here's some more chocolate!!


Ingredients:

12 oz silken tofu
12 oz chocolate chips (1 bag dude)
3 Tbsp maple syrup
1 tsp vanilla extract
1 pre made graham cracker crust or a bunch of graham crackers and margarine to make your own!

Also: a blender or food processor!


Directions: Pour chocolate chips into a glass bowl and nuke for 2 minutes (1 minute if its summer time and your house is all hot already) OR if you want to be fancy melt them in a double boiler. Personally I always microwave because its faster, there is less clean up, and my food just tastes a little better with a small amount of radiation. Make sure you stir it every 30 seconds or so to prevent burnage.


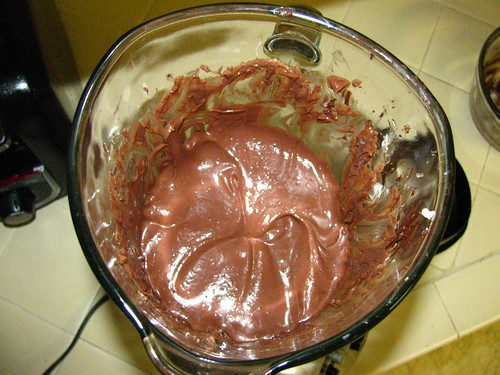
Drain water from the tofu and cut into chunks for easy blending, I put these in the blender first because they are soft and mush well. Pour the maple syrup and vanilla in there too, don't blend that shit yet! Once the chocolate is done melting, (it may still look chippy, if you have a powerful blender that's okay. If not keep melting, be careful the bowl will be very hot!) scrape the chocolate into the blender with a rubber spatula. Now we are ready to blend! Keep the spatula handy to scrape the sides inbetween blend cycles! This part takes a while so just stick with it.


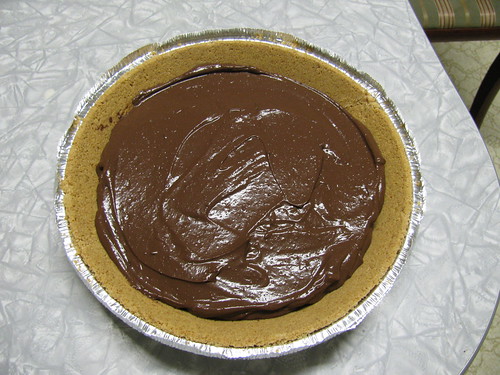
Once its blended nice and smooth (like buttah) pour it into the graham crust! You can use the rubber scraper for this part too, man are these guys handy! You can smooth the chocolate mixture down with the spatula or just wiggle the crust a little to even it out.


Now comes the horrible part!! You have to wait FOREVER for this pie to be ready. Cover and put it in the fridge and leave it there, I always do overnight at least, (before its even slicable!) but it tastes better and gets firmer and "Mousier" the longer its in there! I believe it reaches its peak as a 2 day old pie. Granted the first time you make this you will want to eat it right away and might be a little dissapointed at first. I'm warning you, just be patient! Patience is a virtue, pie is also a virtue. Patience pie baby.

This is a perfect summertime pie because you don't have to use the oven, it's served cold (it starts getting mushy at room temp) and is great topped with whipped cream! Its so rich and creamy your friends won't be able to tell its tofu!

Enjoy!!

Monday, January 19, 2009

Danny's famous vegan banana chocolate chip cookies!

Not to get an ego or anything, but these cookies are kind of a big deal. I made up the recipe years ago so I could make my friend vegan cookies for her birthday, lets just say she ate so many she got sick. Ever since then these cookies have been a staple at most potlucks and parties I attend. These cookies have gotten me so much praise and esteem, and now world, its your turn.

(this picture is missing a few cookies, I can't even keep them on the plate!)

Ingredients:
2 regular sized bananas (if the bananas seem large use just one!)
1/2 cup margarine (1 stick! I saw this as a question on who wants to be a millionaire once and the lady got it WRONG!!)
1/4 cup sugar
1/4 cup brown sugar
2 cups flour
1 tsp salt
1 tsp baking powder
1 tsp vanilla
4 oz chocolate chips
1/2 cup almond meal (or really any nut meal or just nuts [i like walnuts or sliced almonds] if you don't want to get fancy... if you have some sort of nut vendetta just don't use them and put in a little more flour!)

Directions:
Preheat oven to 350 degrees. Lightly grease your cookie sheet.
Cream bananas and marg together (I use a potatoe masher! if the margarine is mixed in cold it's harder to mix completely but your cookies will have delightful flavor pockets. I never bake with melted butter!) Mix in sugar, brown sugar and vanilla extract!

In a seperate bowl (I know you won't use a seperate bowl cause you are stubborn like me!) mix flour, salt, nutmeal (optional) and baking powder together and slowly mix them into the butter banana concoction. If it seems too gooey (big bananas) add in a little more flour. We want it to be kind of thick so our cookies don't pancake.


Once thats all mixed together you can add in your chunky stuff like chocolate chips and nuts! stir those in real good and then place heaping tablespoons onto the cookie sheet appropriately spaced. I usually do a 3 x 4 type of deal. Bake for 15 minutes or until the edges are a light golden (bake magic) color!

Let cool for a few minutes so you don't burn your greedy little mouths. OR... flip some of them puppies right into a bowl and put a scoop (or two) of your favorite ice cream on top. Eat immediately, prepare for your world to explode. (this is not recommended for people who cannot handle extreme amounts of delicious.)

Another suggestion: In the summer I love to freeze the dough before its baked and eat it like, well... cookie dough.

Enjoy!!

Friday, December 12, 2008

Chocolate Truffles!

I like chocolate, can you tell? These are really easy to make and require a tiny bit of patience but it's SOOOO worth it.


You will need:
One bag of chocolate chips
8 oz of cream cheese (imitation for me thanks)
1 c. powdered confectioners sugar
approximately 1 c. cocoa powder, coconut, or ground up nuts (I put them in a blender) to use as a coating. Trader joes also sells nut meals that are already smashed for you but that takes a lot of the fun out of it.


Melt the chocolate chips in a double boiler (or a small pot inside a big pot filled with water... don't let the water touch the chips, capiche?) You can also use the microwave in a glass bowl but check them ever minute or so because they will burn!

Mix in the cream cheese, you might want to nuke this for a minute too unless you are double boiling then it should melt in nicely. Stir this gunk together until you have got it mixed together all good, then remove from heat and mix in the powdered sugar slowly. I use a cheap electric mixer to get a good consistency, but if you're patient a spoon should work.

Once thats all good and mixed in put the mixture in a bowl and in the fridge for 2 hours or the freezer (if you are impatient like me.. OMG I JUST WANT TO EAT!) until it is still soft but pliable like clay.

wash your hands you mongrel.

Get a plate or small bowl and put the nuts, coconut or cocoa powder in it. I used cocoa powder this time because my roommate is allergic to nuts, but I really prefer almonds. Grab a little bit of this and roll it into a ball that you (or maybe a normal person) would feel comfortable putting in your mouth all at once. You can also make other shapes too but balls are the easiest. Roll the balls in the coating of your choice and set aside. The mixture will melt a little with your touch but that makes clean up more fun cause you get to lick your hands! WHO NEEDS BEATERS? NOT ME!


Once you are done rolling the truffles put them in the fridge so they don't get all melty and disgusting until you are ready to eat them! TA DA!!

Tuesday, December 9, 2008

Chocolat Croissants

This "recipe" is extremely easy (a monkey could make them!) I prefer to eat these for breakfast but they can also be a dessert!


Chocolat Croissants! (I'm feeling french today.)
I used to get these at the grocery store before I was vegan and they were buttery and soft and amazing to eat early in the morning before my brain turned on. I have been making the blanket pigs for a while and it dawned on me last night like... "hey what the hell, why am I not putting chocolate in these?" So I got really excited at the grocery store and raced home.

You will need:
chocolate chips (I use vegan ones of course),
A pre made package of croissants, ( in your grocers refrigerated aisle) the pillsbury ones are usually vegan so I get those, but if you're not vegan get whichever ones you want!

For the topping:
3 Tbsp soy milk
1/3 c. chocolate chips

Unwrap the croissant rolls and pull apart the triangles! Now we're cookin!! Preheat the oven to whatever the package says, mine was 350 degrees! Take a triangle and lay chocolate chips in the long edge of it, I probably used about 8 chips per triangle, I love chocolate. Roll the triangles loosely toward the tiny side until it looks like a little sleeping bag full of chocolate. yum! place them on a cookie sheet evenly spaced so they don't feel cramped and cook them for however long the package says! Its probably like 15 minutes, these suckers are fast!


Meanwhile you can start the ganache topping! (it sounds fancy but thats just the french thing again, no worries) Use a small sauce pan and heat up the 3 Tbsp (the uppercase T means its a tablespoon and not a teaspo0n or tsp.) until it starts to look like its hot, little bubbles form around the edge and it might boil a little. Watch it cause this will take less than a minute! Remove the saucepan from the heat (turn off the stove dummy) and stir in the 1/3 c. chocolate chips! mix with a rubber spatula until they melt all together into a creamy looking sauce. Let this cool a little and then you drizzle it onto the croissants!
bathtub bear approves!

Your finished product should look like this!
YUM!!